
Moving house involves hundreds of small decisions.
What should you pack first?
Which room should each box go to?
Where did you put the coffee machine?
Which box contains your important documents?
And, perhaps most importantly:
How are you going to find anything once all those boxes arrive at your new home?
One of the simplest ways to make moving day easier is to label your moving boxes properly. It sounds like a small task, but clear and consistent labels can make a significant difference during packing, loading, transportation, unloading and unpacking. Instead of opening ten boxes to find one item, you can immediately identify where something belongs. Professional movers can also work more efficiently when boxes clearly show their destination and any special handling requirements.
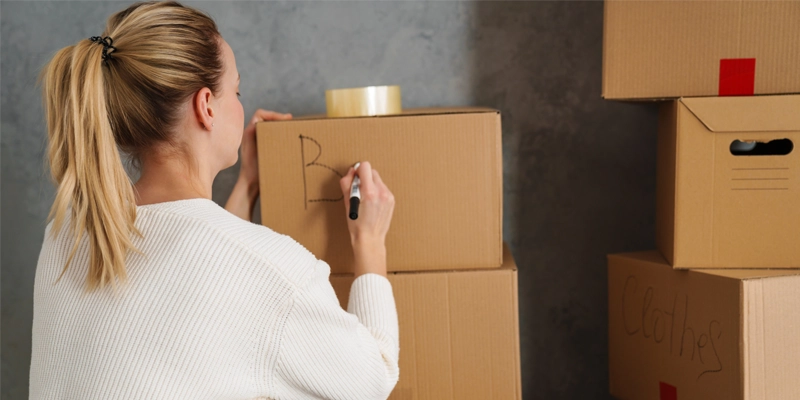
The basic idea is simple:
A good moving box label should tell you what is inside, where it belongs and whether it needs special handling.
In this guide, we’ll explain exactly how to label moving boxes, what information to include, which labelling system to use, how to label fragile and heavy boxes, how to number your boxes, and the common mistakes you should avoid.
Why Is Labelling Moving Boxes Important?
When you’re packing your home, it can be tempting to simply close a box, tape it shut and move on to the next one. That works until moving day arrives. Once dozens of identical cardboard boxes are stacked together, it becomes surprisingly difficult to remember what is inside each one. Clear labelling creates a simple visual system that helps everyone understand where each box belongs.
The benefits include:
Easier sorting
A box labelled Kitchen – Pots & Pans can immediately be taken to the kitchen instead of being opened to discover its contents.
Faster unpacking
You can prioritise the boxes you actually need first instead of opening them randomly.
Easier unloading
If boxes have room labels, movers can identify their intended destination more quickly.
Fewer lost items
A detailed labelling system makes it easier to locate specific belongings.
Less stress
Moving is already demanding. Knowing where your belongings are can remove some unnecessary frustration.
Better organisation
A consistent system keeps the entire move structured from packing day through to unpacking. The original Find a Mover guide similarly identifies organization, faster unpacking, locating belongings and reducing moving stress as major benefits of effective box labelling.
What Should You Write on a Moving Box?
At minimum, your moving box should have:
1. Destination room
2. General contents
3. Handling instructions if necessary
For example:
BEDROOM
Clothes & shoes
BOX 12
Or:
KITCHEN
Glassware
FRAGILE
THIS SIDE UP
For more organised moves, you can also include a unique box number and maintain a master inventory.
The Best Moving Box Labelling System
There isn’t one perfect labelling system for every move. The best system is the one that you can use consistently.
Here are the main options.
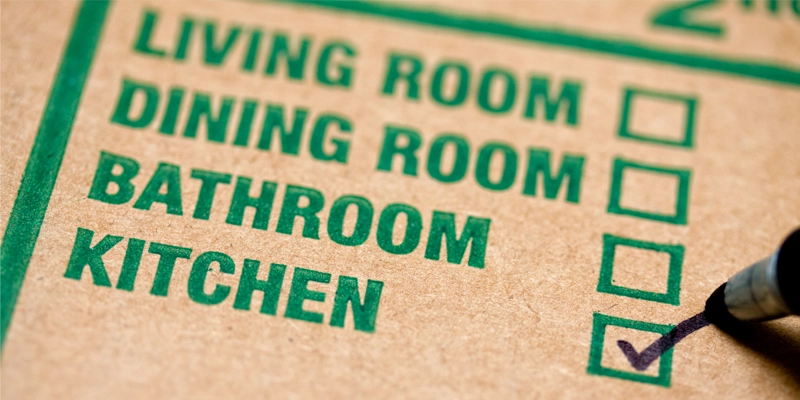
1. Room-Based Labelling
This is probably the easiest method for most households. Simply label boxes according to where they need to go.
Examples:
- Kitchen
- Master Bedroom
- Bedroom 2
- Bathroom
- Living Room
- Garage
- Home Office
- Dining Room
Example:
LIVING ROOM
Books + decorations
BOX 08
Why it works
The main advantage is that the label immediately tells you where the box needs to go. This is particularly useful when unloading a moving truck because boxes can be directed straight to their destination room.
2. Category-Based Labelling
Instead of focusing primarily on the room, you can label the contents.
Examples:
- Books
- Clothes
- Kitchenware
- Electronics
- Documents
- Toys
- Decorations
- Cleaning supplies
For example:
BOOKS
Fiction & novels
BOX 15
This method is particularly useful if you frequently need to locate a specific category of belongings.
3. Number-Based Labelling
A numbering system is useful for larger moves.
Give every box a unique number:
BOX 001
BOX 002
BOX 003
and so on.
Then create a master list.
For example:
| Box | Room | Contents | Priority |
|---|---|---|---|
| 001 | Kitchen | Plates & bowls | Medium |
| 002 | Bedroom | Winter clothes | Low |
| 003 | Office | Documents | High |
| 004 | Bathroom | Toiletries | High |
| 005 | Living Room | Books | Low |
This means that if you need something specific, you can search your list rather than opening every box.
4. Colour-Coded Labelling
Colour coding can make your system even easier to understand.
For example:
🟩 Green = Kitchen
🟦 Blue = Bedroom
🟨 Yellow = Living Room
🟥 Red = Fragile
You can use coloured stickers, labels or markers. The important part is consistency. If blue means bedroom on one box, it shouldn’t suddenly mean the garage on another. Create a simple colour key and keep it somewhere accessible.
5. The Hybrid Labelling System
For most moves, I recommend combining several systems.
For example:
🟦 MASTER BEDROOM
Clothes + shoes
BOX 14
OPEN LAST
This gives you:
- Room
- Contents
- Box number
- Priority
It provides considerably more information without making the label complicated.
What Supplies Do You Need to Label Moving Boxes?
You don’t need expensive equipment.
Permanent markers
Use a high-quality permanent marker with a clear, bold tip. Black is usually the easiest colour to read.
Coloured labels or stickers
Useful for room-based colour coding.
Packing tape
Useful for securing labels and protecting them from moisture.
Fragile stickers
Useful for boxes containing delicate items.
Label maker
Optional, but useful if you’re organising a large move.
Ziplock bags
Excellent for storing:
- Screws
- Bolts
- Furniture fittings
- Cables
- Small accessories
Notebook or spreadsheet
Useful for maintaining a master inventory.
Smartphone
You can also use your phone to:
- Record box numbers
- Photograph labels
- Maintain your inventory
- Photograph furniture before disassembly
The source article recommends permanent markers, coloured labels, clear packing tape, optional label makers, fragile labels, priority labels, ziplock bags and a notebook or smartphone as useful labelling supplies.
How to Label Moving Boxes: Step-by-Step
Now let’s go through the process.
Step 1: Sort Your Belongings First
Don’t start labelling randomly. Before packing, group your belongings.
For example:
Kitchen
- Plates
- Glasses
- Pots
- Pans
- Appliances
Bedroom
- Clothes
- Shoes
- Bedding
- Accessories
Office
- Documents
- Books
- Computer accessories
Sorting first makes the actual packing and labelling much easier.
Step 2: Decide on Your Labelling System
Choose your system before you start.
For example:
Room + Contents + Box Number
This is a simple and effective combination. Try not to switch between systems halfway through the move. The Find a Mover guide specifically recommends choosing a system and sticking to it to avoid confusion.
Step 3: Label the Box as Soon as You Pack It
Don’t leave labelling until the end.
As soon as a box is packed:
Seal → Label → Record
This prevents the common problem of ending up with a pile of unidentified boxes at the end of packing day.
Step 4: Write the Room Clearly
Make the room name large.
For example:
KITCHEN
rather than:
kitchen stuff
The room should be one of the easiest pieces of information to see.
Step 5: Add a Short Description
Don’t just write:
KITCHEN
That’s too vague.
Instead write:
KITCHEN
Pots, pans & utensils
Or:
KITCHEN
Glassware – FRAGILE
This will make unpacking much easier.
Step 6: Add the Box Number
If you’re using a numbering system, give each box a unique number.
For example:
BOX 001
BOX 002
BOX 003
Never give two boxes the same number.
Step 7: Mark Fragile Boxes
If the box contains fragile items, make that obvious.
Use:
FRAGILE
HANDLE WITH CARE
or appropriate handling instructions such as:
THIS SIDE UP
DO NOT STACK
However, don’t rely on a fragile sticker as a replacement for proper packing. Glassware, electronics and other delicate belongings should still be appropriately cushioned and secured inside the box.
Step 8: Identify Heavy Boxes
Some boxes can become surprisingly heavy. Books are a good example. Instead of filling one large carton completely with books, consider distributing the weight across multiple boxes.
You can also mark particularly heavy cartons:
HEAVY
This gives anyone handling the box an immediate warning.
Step 9: Create an “Open First” Box
This is one of the most useful moving tips. Create one or two boxes containing the things you’ll need immediately after arriving.
Label them:
OPEN FIRST
or
ESSENTIALS
You might include:
- Toilet paper
- Towels
- Basic toiletries
- Phone chargers
- Change of clothes
- Basic cleaning products
- Coffee or tea
- Cups
- Basic kitchen items
- Important documents
- Children’s essentials
- Pet supplies
You don’t want to unpack your entire kitchen just to find your kettle.
Step 10: Label Multiple Sides
This is one of the most important details. Don’t put the label on only one side of the box. Boxes can be stacked, rotated and moved during transportation. If the only label is facing another box, you won’t be able to see it.
For best visibility, label:
Top + multiple sides
This allows you to identify boxes without having to move or rotate them. The source article recommends labelling all sides and the top, specifically so boxes remain identifiable when stacked or turned.
Step 11: Photograph Your Labels
Here’s an easy additional trick. After labelling each box, take a quick photo. If a physical label becomes damaged or falls off, you’ll still have a visual record.
For larger moves, you can also photograph:
- Box number
- Contents
- Room
- Special handling instructions
This gives you another layer of organisation.
Step 12: Maintain a Master List
If you’re using numbered boxes, keep a master list. It can be as simple as a spreadsheet:
| Box | Room | Contents |
|---|---|---|
| 001 | Kitchen | Plates |
| 002 | Bedroom | Clothes |
| 003 | Office | Documents |
| 004 | Garage | Tools |
You can also add:
- Fragile
- Heavy
- Priority
- Value
- Notes
This becomes particularly useful for larger household moves.
How to Label Fragile Moving Boxes
Fragile belongings require additional attention. Your label should clearly communicate that the contents need careful handling.
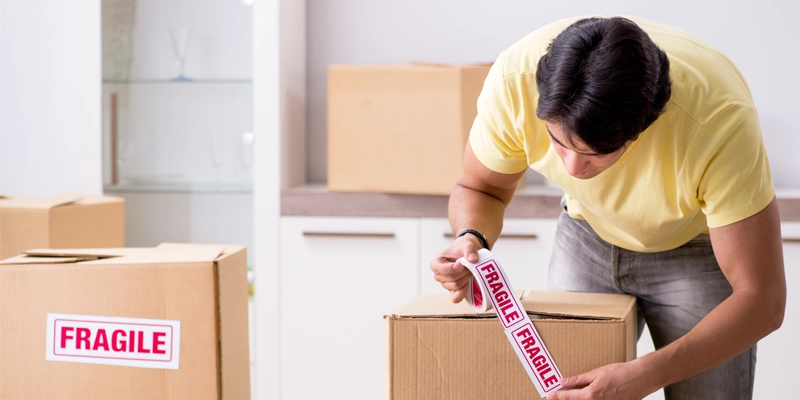
Examples:
Glassware
KITCHEN
GLASSWARE
FRAGILE
Artwork
LIVING ROOM
ARTWORK
FRAGILE
DO NOT STACK
Electronics
OFFICE
COMPUTER EQUIPMENT
FRAGILE
Mirrors
BEDROOM
MIRROR
FRAGILE
THIS SIDE UP
Remember that labels help communicate handling requirements, but the items still need appropriate packing protection.
How to Label Furniture Parts and Accessories
Moving furniture often involves disassembling items. This creates a different labelling challenge.
Imagine taking apart:
- A bed
- Dining table
- Desk
- Wardrobe
- Shelving unit
You may end up with dozens of screws, bolts, brackets and fittings. Put small hardware into a labelled ziplock bag.
For example:
MASTER BED – SCREWS & FITTINGS
Then attach the bag securely to the relevant furniture or store it in a clearly identified hardware box. For electronics, label cables and accessories with the name of the device they belong to.
For example:
TV – HDMI + POWER
DESKTOP – POWER CABLE
PRINTER – USB + POWER
This can save a huge amount of time when you’re setting everything up again.
What to Write on Boxes for Different Rooms
Here’s a useful example system.
Kitchen
KITCHEN – GLASSWARE – FRAGILE
Bedroom
MASTER BEDROOM – CLOTHES
Bathroom
BATHROOM – TOILETRIES – OPEN FIRST
Home Office
OFFICE – DOCUMENTS – IMPORTANT
Living Room
LIVING ROOM – DECORATIONS
Garage
GARAGE – TOOLS – HEAVY
Children’s Room
BEDROOM 2 – TOYS
The more specific the label, the easier it becomes to locate your belongings.
Common Moving Box Labelling Mistakes
1. Writing “Miscellaneous”
This is probably one of the least useful labels. “Miscellaneous” tells you almost nothing.
Instead:
KITCHEN – SMALL APPLIANCES
is much more useful.
2. Labelling Only One Side
Your box may end up facing the wrong direction. Label multiple sides.
3. Using a Marker That Fades
Moving boxes can be exposed to handling, moisture and sunlight. Use a permanent marker with clear, readable ink.
4. Waiting Until Moving Day
Don’t create a labelling system at the last minute. Label as you pack.
5. Making Labels Too Small
A label that looks readable on your desk might be impossible to read from across a room. Make the main information large.
6. Forgetting Fragile Instructions
If something needs special handling, make it obvious.
7. Overloading Boxes
Heavy boxes are harder to handle. Spread heavy items across several cartons where appropriate.
8. Changing Your Labelling System
If you start with colour coding and suddenly switch to numbers without a clear structure, confusion follows. Choose your system before you begin.
9. Forgetting Priority Items
Your first-night essentials should be easy to identify.
10. Not Keeping an Inventory
For larger moves, a master list can save a lot of time.
A Simple Moving Box Label Template
You can use this format:
--------------------------------
ROOM: MASTER BEDROOM

CONTENTS:
Clothes & Shoes

BOX: 014

PRIORITY: LOW

HANDLE WITH CARE: NO
--------------------------------
For fragile items:
--------------------------------
ROOM: KITCHEN

CONTENTS:
Glassware

BOX: 021

FRAGILE
HANDLE WITH CARE
THIS SIDE UP
--------------------------------
For an essentials box:
--------------------------------
OPEN FIRST

CONTENTS:
Toiletries
Phone Chargers
Coffee
Basic Kitchen Items
Change of Clothes

PRIORITY: HIGH
--------------------------------
Should You Label Boxes Before or After Packing?
Label them immediately after packing each box. If you label everything before you know what’s inside, you risk inaccurate information.
A good workflow is:
Sort → Pack → Seal → Label → Number → Record
Repeat the process for every box.
How Labelling Helps Professional Movers
Clear labels don’t only benefit the person moving. They can also make the moving process easier for the moving team. When boxes are clearly labelled with room destinations and handling instructions, movers have more information about where items need to go.
For example:
BEDROOM 2 – BOX 16
is much more useful than:
BOX
Similarly:
KITCHEN – GLASSWARE – FRAGILE
communicates more information than simply:
KITCHEN
Moving With Sam provides moving and furniture delivery services, including home and apartment furniture moving, office furniture relocation, interstate delivery and handling of fragile and bulky items. For a move involving a large number of boxes and furniture pieces, clear organisation can make the handover and unloading process easier for everyone involved.
Labelling Boxes for an Interstate Move
Long-distance and interstate moves require particularly good organisation. When your belongings are travelling a longer distance, you may not want to open every box immediately. A numbered inventory becomes particularly useful.
For example:
BOX 001–010 → Kitchen
BOX 011–025 → Master Bedroom
BOX 026–035 → Living Room
BOX 036–045 → Office
You can then quickly check whether your boxes have arrived and locate specific belongings. If you’re moving between major Australian cities, planning your packing and labelling system before moving day can make the transition considerably easier.
Labelling Boxes for an Office Move
Office relocations need a slightly different approach.
You may have:
- Computers
- Monitors
- Documents
- Stationery
- Office furniture
- Cables
- Files
- Printers
- Equipment
Consider using:
Department + Employee/Desk + Contents
For example:
MARKETING
HANZALA – DESK 04
MONITOR + ACCESSORIES
This can make it much easier to restore the office after relocation. Important documents and sensitive materials should also be handled according to your organisation’s security and privacy procedures.
The Ultimate Moving Box Labelling Checklist
Before moving day, make sure:
- Every box has a label
- Room destination is clearly marked
- Contents are briefly described
- Box numbers are unique
- Fragile boxes are clearly identified
- Heavy boxes are marked where necessary
- Priority boxes are clearly identified
- Handling instructions are visible
- Labels are placed on multiple sides
- Furniture hardware is labelled
- Electronics cables are labelled
- Master inventory is complete
- Photos of important labels have been saved
- An essentials box is ready
Final Thoughts
Moving boxes are much easier to manage when you know exactly what’s inside them and where they’re supposed to go. The goal isn’t to create a complicated labelling system. The goal is to create a system that you, your family and your moving team can understand immediately.
For most household moves, a simple combination of:
Room + Contents + Box Number
Add FRAGILE, HEAVY, THIS SIDE UP or OPEN FIRST when necessary. For larger moves, add colour coding and a master inventory. Most importantly, don’t wait until the last minute.
Label your boxes as you pack them. Those few extra minutes during packing can save you hours of searching and confusion when you arrive at your new home. And when your belongings are ready to move, having a clear system makes the entire process easier from packing and loading through to delivery and unpacking. At Moving With Sam, we help customers and businesses with moving, furniture delivery and relocation services, including home and apartment moves, office relocations, interstate delivery and bulky or fragile-item handling.
A well-labelled box is a small step that can make a big difference on moving day.
SEO Topic & Semantic Keyword Map
For the MWS version, I would naturally cover these related entities and search terms:
Primary topic
- how to label moving boxes
Supporting topics
- moving box labels
- how to label boxes
- moving box labelling system
- moving house packing
- packing boxes for moving
- moving checklist
- organise moving boxes
- moving house organisation
- unpacking after moving
Specific entities/topics
- room labels
- colour coding
- box numbers
- master inventory
- fragile labels
- heavy box labels
- priority boxes
- open first box
- electronics cables
- furniture hardware
- ziplock bags
- packing tape
- permanent markers
Commercial supporting terms
- professional movers
- moving services
- furniture moving
- furniture delivery
- interstate moving
- office relocation
- bulky furniture delivery
- fragile item moving
- last-mile delivery
Recommended internal links
Once this is published on Moving With Sam, internally link relevant phrases to your existing service pages, especially:
- Furniture Delivery
- Local Moving & Delivery Services
- Interstate Courier & Delivery Services
- 3PL Services
- Melbourne furniture delivery
- Sydney moving services
- Brisbane moving services
- Adelaide moving services
- Perth moving services
Moving With Sam’s current site already positions its furniture delivery offering around homes, businesses and retailers and lists services such as same-day furniture delivery, home/apartment moving, office relocation, interstate delivery and fragile/bulky-item handling.